Walkthrough 6-1: View event data
In this walkthrough, you create a new project to use in the next two modules to learn about Mule events and Mule applications. You will:
· Create a new Mule project with an HTTP Listener and set the event payload.
· View event data in the DataSense Explorer.
· Use a Logger to view event data in the Anypoint Studio console.
Create a new Mule project
1. Return to Anypoint Studio.
2. Right-click training4-american-ws and select Close Project.
3. Select File > New > Mule Project.
4. Set the project name to apdev-examples and click Finish.
Note: It is recommended that for greater product stability and to avoid excessive memory consumption you set the mule.apikit.parser VM argument for this new project as outlined in the Check for course updates and/or issues section of this course.
Create an HTTP Listener to receive requests
5. In the Mule Palette, select Favorites.
6. Drag an HTTP Listener from the Mule Palette to the canvas.
7. In the Listener properties view, click the Add button next to Connector configuration.
8. In the Global Element Properties dialog box, verify the host value is set to 0.0.0.0 and the port value to 8081.
9. Click OK.
10. In the Listener properties view, set the path to /hello.
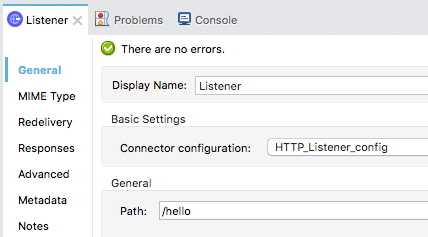
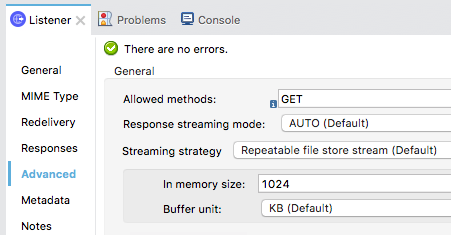
11. Click the Advanced tab and set the allowed methods to GET.
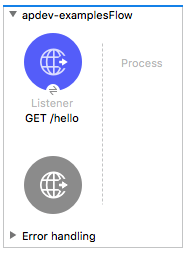
12. Click the General tab and set the display name to GET /hello.
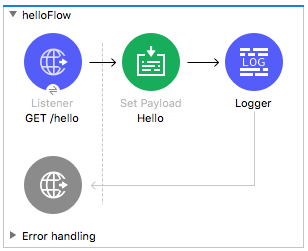
Change the flow name
13. Select the flow.
14. In the apdev-examplesFlow properties view, change the name to helloFlow.
Set the event payload
15. Drag a Set Payload transformer from the Favorites section of the Mule Palette into the process section of the flow.
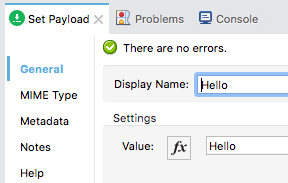
16. In the Set Payload properties view, set the display name to Hello.
17. Switch the value to literal mode and set its value to Hello.
Add a Logger
18. Drag a Logger component from the Mule Palette and drop it at the end of the flow.
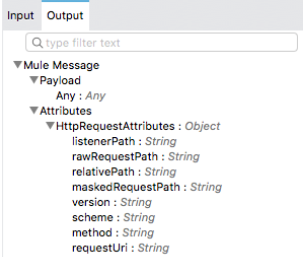
View event structure and metadata in the DataSense Explorer
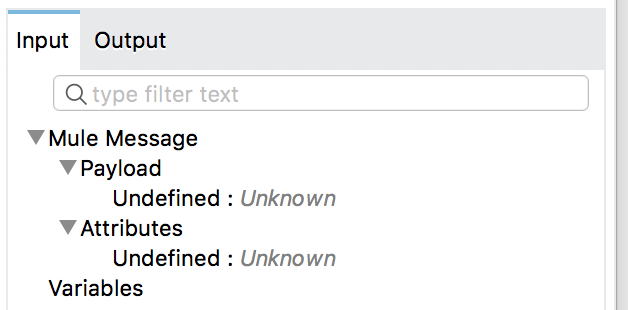
19. Select the GET /hello HTTP Listener and locate the DataSense Explorer in the right-side of its properties view.
20. In the Input tab, examine Payload and Attributes.
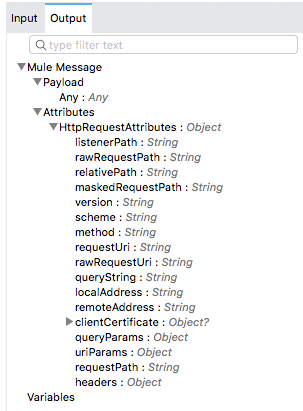
21. Select the Output tab and examine Payload, Attributes, and HttpRequestAttributes.
22. Select the Set Payload component in helloFlow.
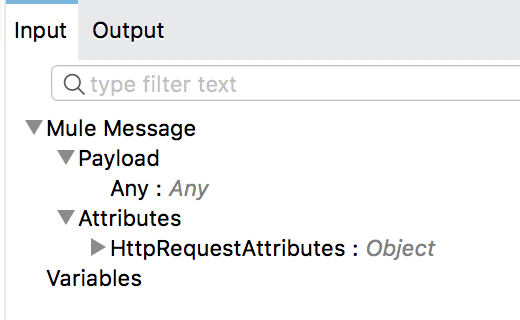
23. In the DataSense Explorer, examine Payload and Attributes in the Input tab.
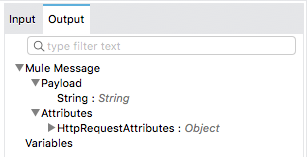
24. Select the Output tab and examine Payload and Attributes.
25. Select the Logger component in helloFlow.
26. In the DataSense Explorer, examine Payload and Attributes in the Input tab.
27. Select the Output tab and examine Payload and Attributes.
Run the application and review response data
28. Save the file and run the project.
29. Return to Advanced REST Client and click the button to create a new tab.
Note: You are adding a new tab so that you can keep the request to your American API saved in another tab for later use.
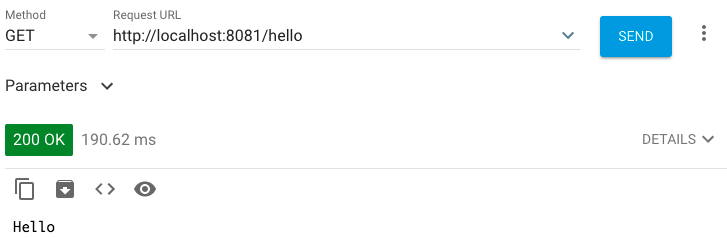
30. In the new tab, make a GET request to http://localhost:8081/hello; you should see Hello displayed.
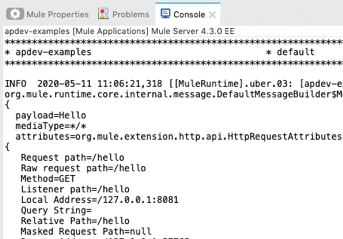
View event data in the Anypoint Studio console
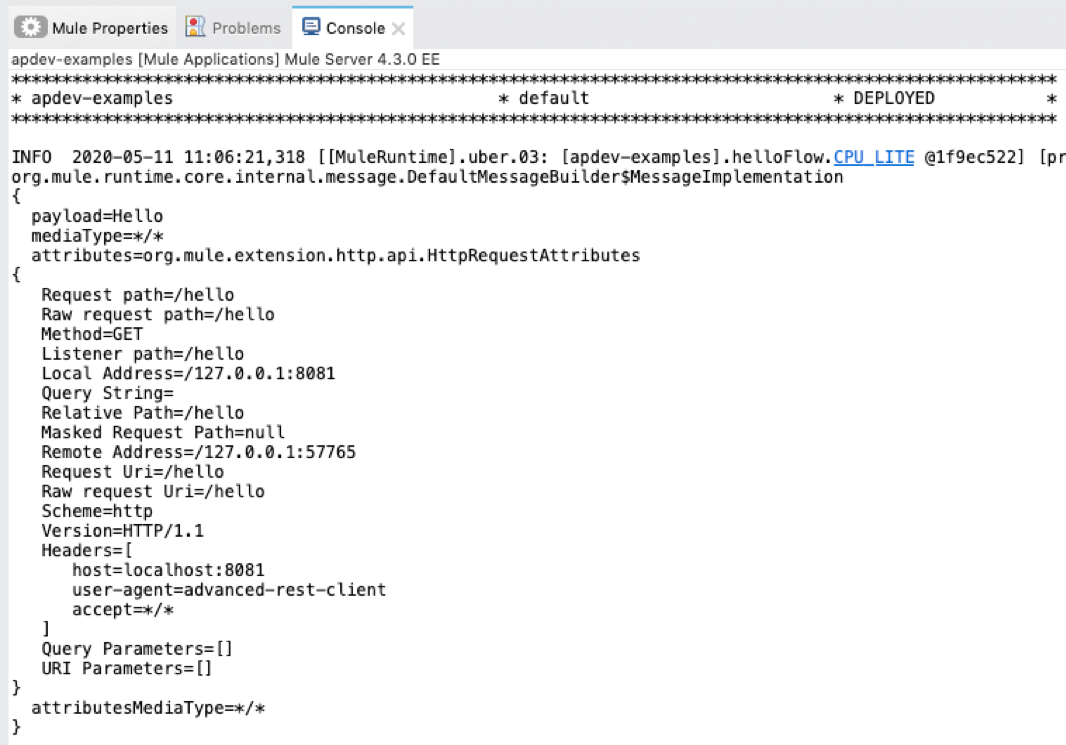
31. Return to Anypoint Studio and look at the console.
32. Locate the data displayed by using the Logger.
33. Review the event attributes.
Send query parameters with a request
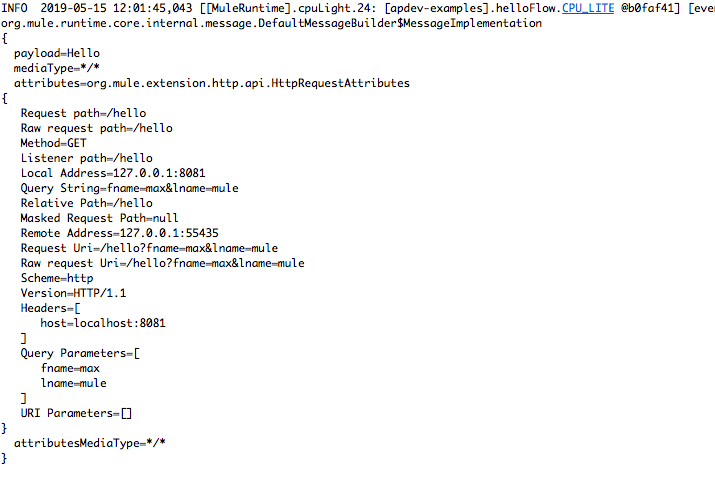
34. Return to Advanced REST Client and add a query parameter with a key of fname and a value of max.
35. Add a second key/value pair of lname and mule.
36. Click Send.

37. Return to Anypoint Studio and look at the console.
38. Locate the query parameters in the logged event data.
39. Stop the project.